Topsides looking a bit dull? David Parker describes how to buff up your boat by choosing the right polishing compounds and a power polisher
When you have owned wooden boats, as attractive and charismatic as they are, there is no getting away from the fact that the maintenance of one of any size demands a heavy time commitment. Which is why I now own a very forgiving, low-maintenance GRP hull.
Of course that too needs looking after but, providing the hull is sound, restoring a faded and oxidised gelcoat surface is a pretty straightforward process. Indeed this is a job which many boat owners are capable of, if you follow a few simple guidelines and have the right kit.
The reason gelcoat becomes chalky and hazy over time is that as it ages the effects of harsh marine conditions take their toll.
The main culprits are oxidisation, ultra-violet light damage and environmental pollutants.
Oxidisation occurs because of the presence of oxygen in the atmosphere. Gelcoat is polyester resin and as oxygen reacts with polymers in the resin it weakens their structure due to a ‘free radical’ attack on carbon atoms. Ultra-violet light accelerates this process, which in turn enables the degradation to work deeper into the polymer matrix causing a loss of gloss and pigment discolouration.
Gelcoat also becomes increasingly porous as it gets older, therefore it is more easily subjected to staining from water and airborne dirt particles.
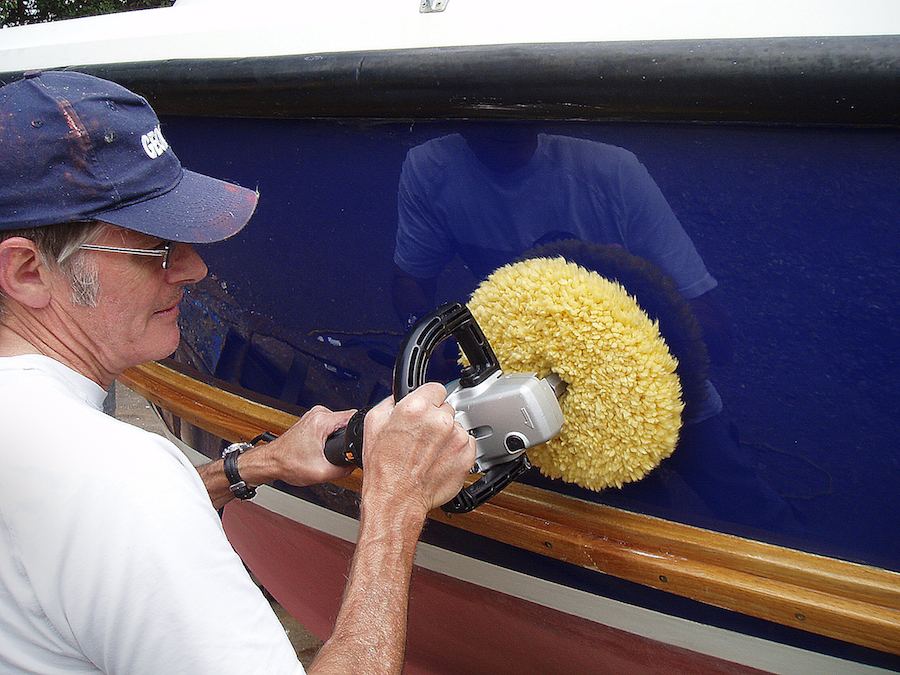
For the process of restoring oxidised gelcoat the products required are cleaners, polishing compounds, and waxes. Small areas can be treated by hand, but for a hull you will need a power polishing machine. Note the term ‘polishing’ here is not to be confused with waxing. In this context polishing relates to using a rubbing compound which actually abrades the gelcoat to rejuvenate its shine. In the ‘compounding’ process you are effectively removing the microscopic broken bonds in the degraded gelcoat and exposing new full polymer bonds. The polishing compounds typically contain aluminum oxide and it is this mineral which actually does the ‘cutting back’ of the gelcoat to remove the chalkiness and loss of colour.
Correctly done, this process then gives consistency once again to the pigment and restores the finish to a high lustre. However because rubbing compounds are abrasive then once you start compounding it you will have to keep doing this, typically once a year to keep the gelcoat in top condition. You will also have to wax it at least twice and possibly three times a year to further stop UV light attacking the surface.
Keeping it clean
Basically there are three stages involved in gelcoat polishing, each of which requires a separate type of product. The first, as you might guess, is cleaning. The surface has to be thoroughly washed because there is no point compounding dirt and dust into a hull with a powerful polishing machine. Indeed the removal of grime and heavy accumulations of film alone can dramatically improve the look of the gelcoat. Also frequent washing is relatively inexpensive and will prolong the life of the resin surface because it removes contaminants before they have a chance to bond or etch into it. A thoroughly washed and prepared gelcoat will also keep polishing pads and cleaning cloths in better condition during the next stage.
A hose or pressure washer is a good way to initially remove all loose air and water-borne dirt. However there are also advantages to cleaning areas by hand, because by doing so you are more likely to notice any areas which may require spot maintenance, such as gelcoat filler for minor damage.
For general cleaning, detergent-based boat washes will remove wax, grease and other light contaminants. Mineral stains, caused by rust marks and minerals leaching out of dirt, will require a proprietary agent formulated to remove stains using chemicals to dissolve or bond to them so the stains can be rinsed away. Usually these are brush-on gel formulations. After cleaning, rinse and dry the hull before proceeding to the next stage.
For mild oxidisation ‘One-Step’ products which combine a rubbing compound and a wax may be an option. However for a heavily oxidised or chalky hull then ‘cutting back’ with a dedicated polishing or rubbing compound will be required. When the surface is clean, if you have revealed any deep scratches, gouges or chips then a gelcoat repair will be necessary. Only ever use harsh treatments such as wet and dry paper on a hull as a very last resort.
Getting abrasive
As outlined above all polishing compounds gently abrade the gelcoat and products labelled as colour restorers and sealers also normally contain abrasives to a lesser degree to achieve the same results. To test whether a product has abrasive properties put a small drop of compound on the tip of your finger and you should be able to feel particles in solution which actually do the ‘cutting back’. Compounds are available in various grades starting with coarse and getting successively finer.
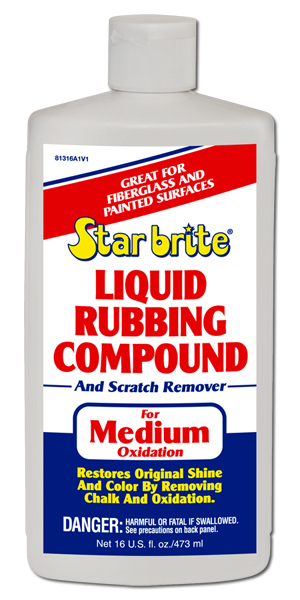
Bear in mind when selecting a grade that just mildly abrasive products can often restore moderately oxidised surfaces when used with a polishing
machine and the correct polishing buffs. Using a more aggressive cutting compound than is required wears away the gelcoat unnecessarily. Gelcoat is essentially cosmetic and is the resin coating applied to a highly polished mould at the beginning of the boat building process, so it is relatively thin. If it is too heavily abraded, particularly when using a machine, then you could even end up exposing the GRP lay-up itself.
When the correct grade of an initially coarser compound has been used, the same area is then compounded with a lighter grade finishing compound to remove swirl marks and smooth the surface. For the finest compounding grades, manufacturers often recommend softer types of polishing buffs for their machines, particularly for darker hulls where compounding imperfections will be more noticeable than on lighter gelcoat.
The process will be complete when you have achieved a depth of shine you are happy with and an even colour with no haziness. Check from a variety of angles because swirl marks may not be visible from one side depending on how the light is falling. Also gauge the quality of the finish by looking for a reflection which is smooth and not distorted.
Waxing your buff
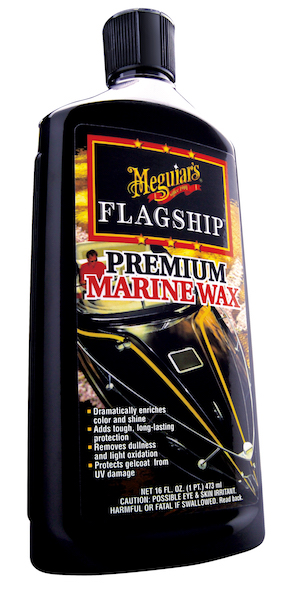
After using the successive polishing/rubbing compounds, the exposed new shiny surface must be protected with a good quality marine wax to seal it. Marine Wax provides a durable protective layer and has UV inhibitors to help stop fading and oxidisation, and a deep gloss wax reflects back a lot more damaging UV light. It also prevents further staining.
For waxing, warmer temperatures are ideal because if it’s too cold the polish becomes hard to work into a surface. However on a hot day in direct sunlight it will dry too quickly and not ‘flow.’
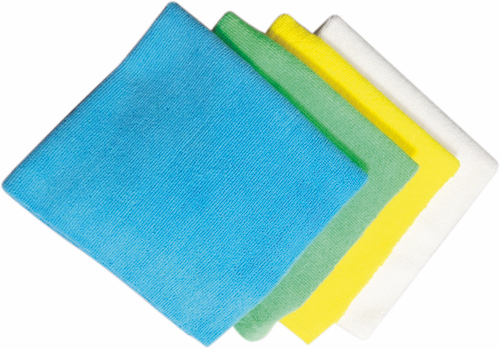
Some waxes can be applied by hand or machine, but by hand is often preferred so the wax goes on the boat and is not clogging up the buffing pad. If you use a machine, then have separate buffs for compounding and waxing if possible because it can be difficult to get them completely clean if you’re down at a boat yard only using cold water. For hand waxing, microfibre cloths or soft cotton towels are the best thing to use.
Wax an area about a couple of square feet at a time applying it with a steady circular motion. When dried to a haze polish with a clean cloth. A gelcoat surface can also be sealed using synthetic compounds such as acrylics which are applied in a number of coats. Glazes such as these cure to form a permanent coating so are different from waxes which remain semi-solid and can be reapplied and buffed again as necessary.
Polishing Products
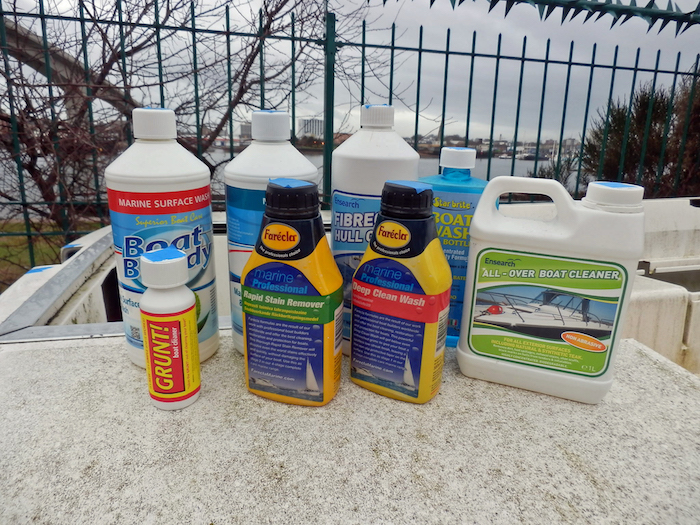
The selection of boat cleaners, polishes and waxes to choose from is huge with brands like Farécla, 3M, Silky, Rupes, Starbrite, Boat Buddy, Ensearch, Meguiars, and Collinite. They are a bit like antifouling or varnish in that people tend to find a make they like and stick to it and as ever price, availability and budget will be a factor. I find that with the budget products available in chandlers you tend to use more of their abrasive compounds to get a good result. Below I have highlighted a typical selection of cleaning and polishing products which I have found perform well and are straightforward to use. But whatever the brand, preparation and proper application are key to achieving good results. As with any maintenance job whether it be painting, varnishing or polishing the results achieved are only ever as good as the work put in.
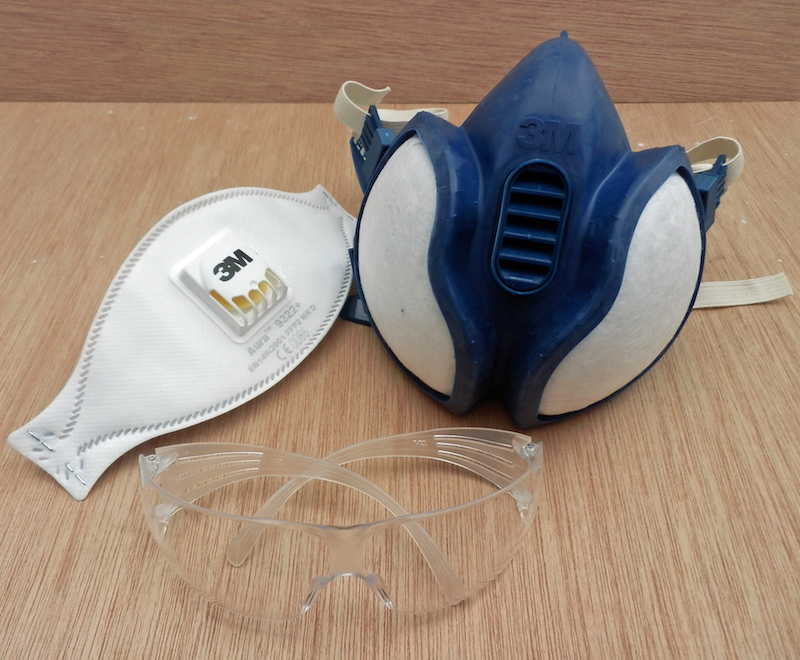
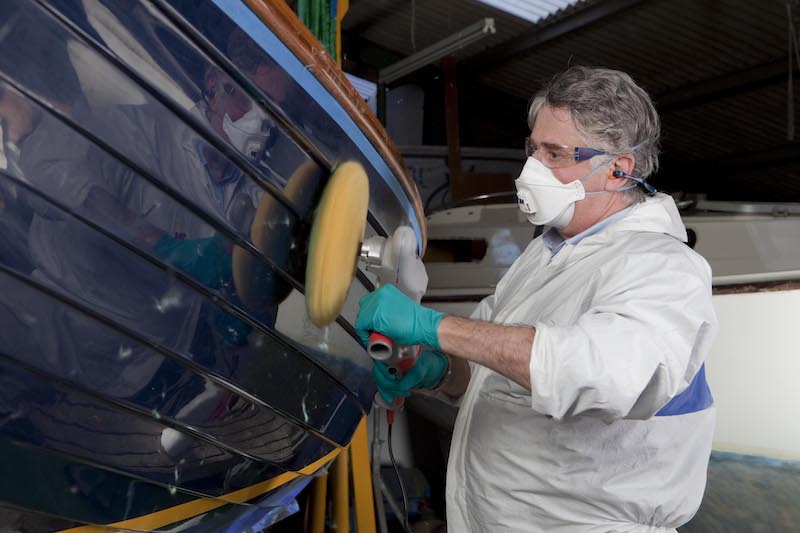
If working overhead wear eye protection and it is also often preferable to wear gloves when rinsing out polishing buffs. I find the black gauntlet type of rubber gloves are ideal for this. They are also much more comfortable to wear than the blue nitrile surgeon’s type of gloves, which are best saved for the fiddly bits such as when cleaning metal fittings etc. If you need to work low to the ground then knee pads are also recommended.
For larger craft, working from a ladder is fine, but if you can use trestles and scaffold boards to make a working platform this can be more convenient.
Work in a ventilated area because many products contain petroleum distillates which could be harmful if inhaled and cause nose and throat irritation.
Don’t use an electrical polisher when the boat is afloat
3M
You often see 3M products used in yards by professional boat polishers which in itself is a strong endorsement. ‘One-Step’ treatments include the Fibrecglass Cleaner and Wax and the Fibreglass Restorer and Wax both of which contain a rubbing compound. The Cleaner and Wax is for light to medium oxidation and the Restorer and Wax for heavier work. Both are effective in producing an even gloss finish although you may find you have to have the machine running at high revs to get a good shine.
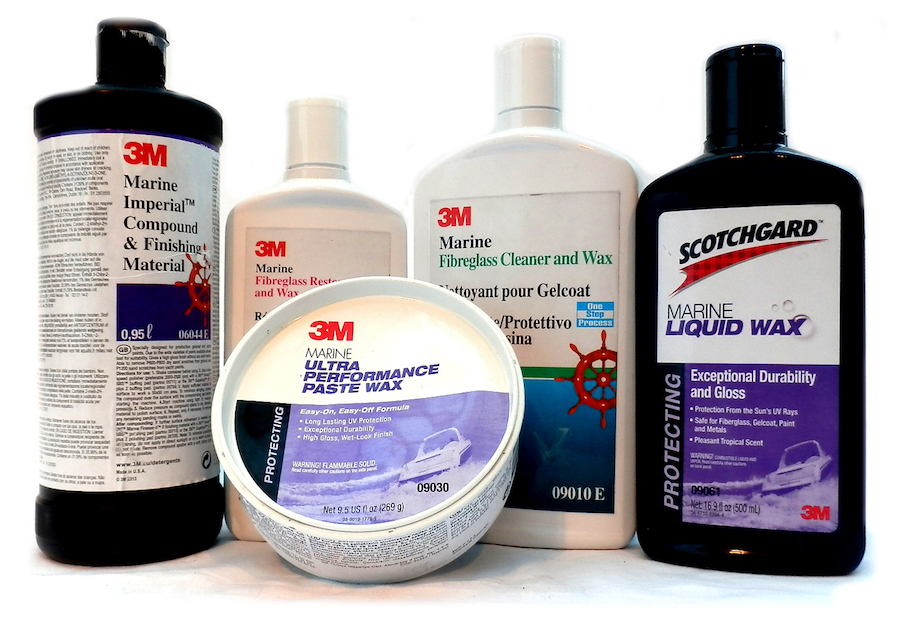
Fibreglass Cleaner and Wax
Fibreglass Restorer and Wax
Marine Imperial Compound
& Finishing Material
Marine Finesse-It Finishing
Ultra Performance Paste Wax
Scotchgard Liquid
Marine Wax
Where oxidation is heaviest it is best to use 3M polishing
compounds and waxes separately. Here the Marine Imperial Compound & Finishing Material followed by the Finesse-It II Finishing Material will achieve good results. The Imperial Compound has more aggressive ‘cutting back’ properties to rapidly compound the surface and it is used with a white lambswool buffing head. The finish achieved with this product alone is high and it is then recommended that you follow it with the Finesse-It II compound using a 3M yellow lambswool buffing head, particularly on a darker coloured hull where compounding marks might be more noticeable. I find the Scotchgard Liquid Marine Wax goes on more easily than the Paste Wax but in warm temperatures the stuff in a tin is handy to keep on board to touch up areas, and both gave a good shine.
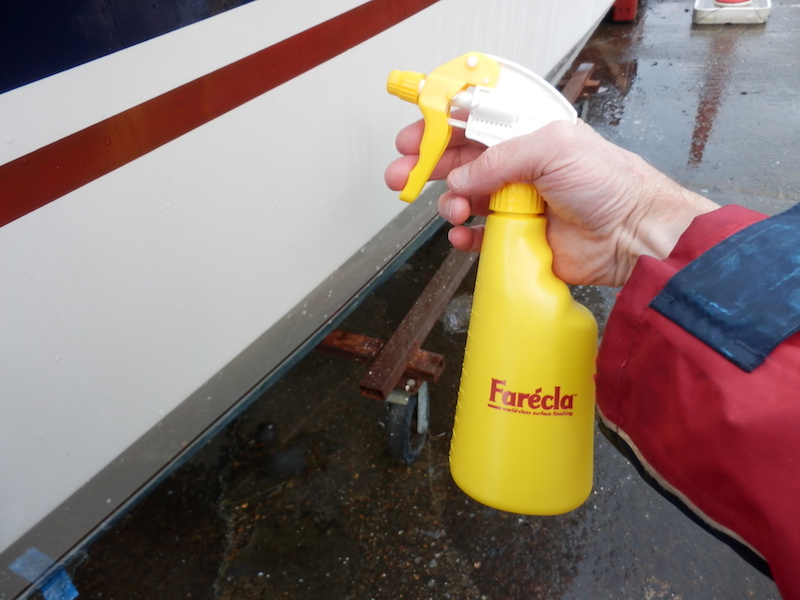
Farécla
Farécla have one of the widest boat cleaning product ranges but one product I particular like for preparation work is the Rapid Stain Remover. It is a gel formulation containing oxalic acid which you brush on, leave to work for 10 minutes and then wash off, although you might need a plastic scraper to help with the really stubborn dirt. The Deep Clean Wash is also one of the superior general cleaners and can be mixed with water in various concentrations depending on what the job requires. Profile Power Wash can be used by hand as well as in a power washer.
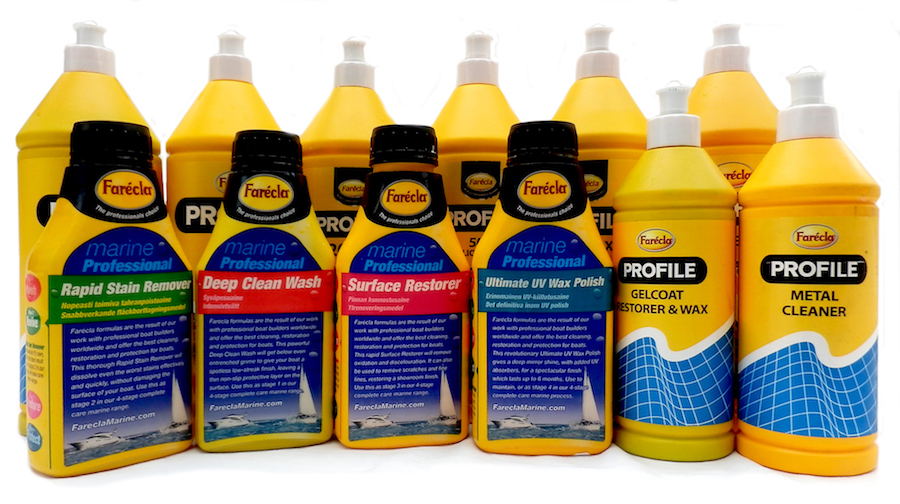
Deep Clean Wash
Profile Power Wash
Rapid Stain Remover
Surface Restorer
Profile Gelcoat Restorer /Wax
Profile UV Wax
Profile Polymer Wax
Profile 200 XL Supercut
Profile 300
Profile 500
Metal Cleaner
As regards polishing compounds, the Surface Restorer is designed to remove lighter oxidisation, discolouration, fine lines and surface scratches. The Gelcoat Restorer and Wax does a similar job for milder discolouration and includes a wax to coat the surface afterwards.
However for more serious oxidisation there are compounds available in various grades going from extra coarse to fine. The fiercest I have used is the 200XL Supercut Surface Restorer but this is too aggressive for general use. It is really designed for something like smoothing up to P800 grit sanding marks following a gelcoat repair. So for general maintenance and oxidisation removal start with the 300 Rapid Cut and finish with the 500 Liquid Cut. Most of the compounds are also available in mini tubes.
With the waxes Profile UV Wax contains a high level of carnauba wax and is the more traditional type of boat wax which goes on quite thickly as you work it in. Profile Polymer Wax has a lower viscosity and goes on more quickly but still produces a good gloss finish with evenness and clarity.
Collinite
I have included these as none of the Collinite products contains abrasives and they achieve good results by hand providing a hull is not too heavily oxidised. However in my opinion for
serious fading and discolouration more aggressive compounding products would be required.
The first step is the Fibreglass Boat Cleaner designed to remove light oxidation, dirt, film, oil, grease and
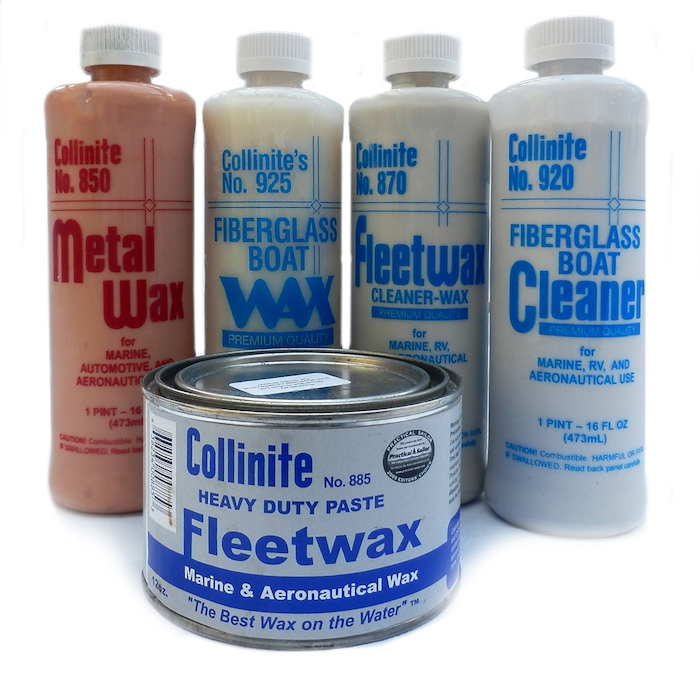
No. 920 Fibreglass Boat Cleaner
No. 850 Metal Wax
No. 870 Cleaner Wax
No. 925 Fibreglass Boat Wax
No. 885 Heavy Duty Paste
staining. It is not a detergent but quite viscous with the consistency of a liquid wax. By hand it does give good improvement for little effort but using a power polisher with a polishing pad is far better.
Collinite also produces a range of waxes. Cleaner-Wax 2 in 1 is designed for lighter jobs to remove dirt and mild oxidation. However it is also recommended that for added protection you follow up with one of the final stage waxes such as Fibreglass Boat Wax. This is also a stand-alone liquid wax after the cleaner and is designed to protect the coating against weather and UV light.
The best of the bunch though for me is the Collinite Heavy Duty Paste Wax which gives a high gloss surface and is one of the best boat waxes I have used.
Power Polishers: Polishing technique with a machine
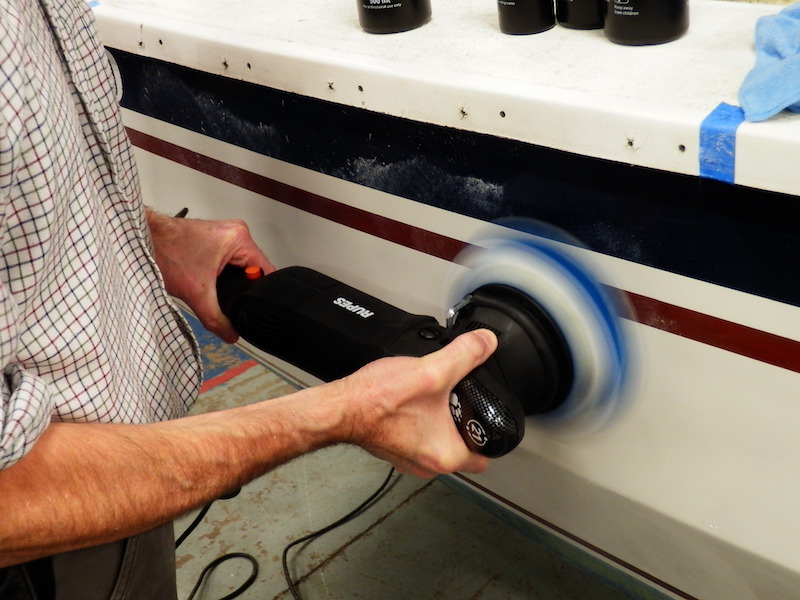
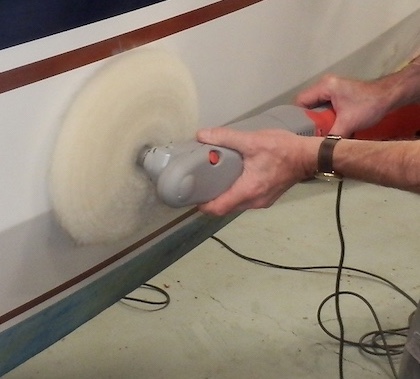
When using a polishing machine work slowly and systematically, cultivating a light touch. If polishing compound is in a tub, it can be painted on or applied with a soft cloth but do not let the paste dry out and do small areas at a time.
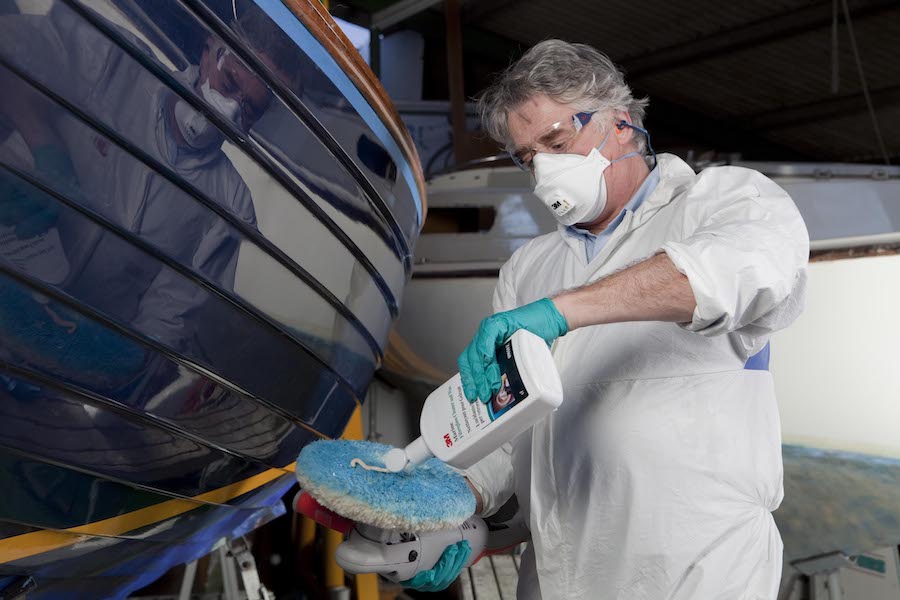
If it’s in a bottle always remember to give the compound a good shake before use to ensure any suspended particles which have settled out are well mixed.
Then squeeze out several blobs of polish on the buffing head each time you need to apply it. Hold the machine and then with it still switched off use the buffing head itself to spread the polish on to the gelcoat area with a figure of eight action. If you start the machine before doing this you will find you probably splatter polish compound everywhere.
Once the compound is reasonably spread on the area to be treated, gently bring the polishing pad against the gelcoat and start the machine slowly to prevent compound spraying off. Work on small areas of about a couple of square feet or a shoulders’ width at a time and use an overlapping circular motion.
Keep the machine moving and don’t linger too long on the same spot. Recommendations for operating speeds vary; some manufacturers state that you should run a rotary machine at between 1500 and 1800 rpm. For me this is too quick and I find that working around 1000 rpm is adequate. If in doubt choose a slower speed and avoid excessive pressure which can damage the gelcoat.
There is a massive range of polish products to choose from, however how they are applied and worked to high lustre will make a big difference. This is where the importance of a decent buffing head comes in. Typically manufactures have their own versions of foams and buffs with backing pads but I find the wool/acrylic 3M double-sided polishing pad to be very effective and the easiest and quickest type to clean. With the correct chuck fitting, rotary polishing machines can be used with either foam or lambswool buffers and an M14 adapter may be required to fit the 3M buffs to some machines
At the leading edge of mouldings it is very easy to abrade through the gelcoat if a vulnerable profile is compounded too heavily. Polishing machines are highly effective but can quickly wear through gelcoat. Similarly take special care on the exterior angles of a chine hull; if in doubt just work up to an edge with the machine and do the vulnerable areas by hand using polishing cloths. Around fittings it is also better to work by hand and in tight spots on deck watch out for cable snags. A snagged cable can snatch at the machine and then the wire can end up wrapping itself around the polishing wheel and rip out if you’re not careful. I have had this happen to me once when I was distracted … it is easily done.
Always rinse out the polishing pad in water when changing through the compound grades then spin the buff at high speed on the machine to dry it. When you have finished using it for the day also wash the pad clean. If you do not, then next time not only will the buff be less effective, but wax allowed to harden into a polishing pad will go solid and can cause scratches. Similarly always wash out polishing flannels and microfibre cloths after use. Do not lay a polishing pad face down on the floor or it will pick up grit. A water spray bottle is also useful to locally clean areas and help buff dried compound.
Choosing a polisher
A key part of getting good results is using a decent polishing machine and buffing accessories. Some polishers can also be used for sanding but the cheaper automotive type of twin-grip buffers you see typically in car accessory shops are just for buffing wax so are not suitable for use with the compounding polishes used to restore gelcoat.
Proper boat polishing machines have a rotary or orbital movement at the disc head but whichever design you choose look for one with a variable speed. Do not use a grinder with a buffing attachment. High speed machines generate too much heat into the gelcoat.
One way to lessen the risk of surface damage due to heavy- handed operation is to choose an orbital type polisher, also known as a dual action machine. These combine an oscillating and elliptical motion designed to reduce swirl marks. They are considerably more expensive but mirrors the action of the hand as the whole pad moves at the same speed in small orbits. This makes it easier to control and you tend to keep the polishing head flatter on the surface which avoids hot and cold spots.
Random orbital machines are a big advantage for the less experienced but they can be heavier and vibrate more. Use foam pads, which help dissipate heat, or microfibre buffers.
However the straightforward rotary polisher is perfectly adequate if used with care.
With the rotary polisher a pad with a large circumference will allow you to cover a bigger area quickly but the outer edge which does the work will be spinning faster than the centre, generating more heat.
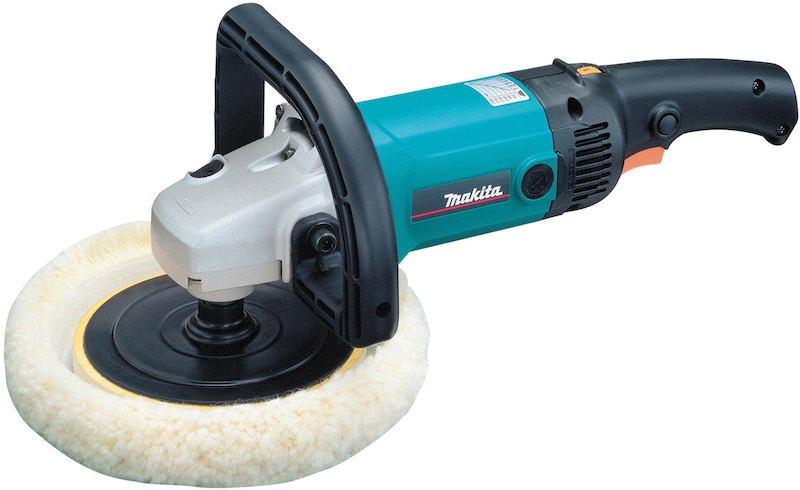
The Makita 9227CB (£199.96) polisher’s build quality is impressive although it can seem a bit bulky and heavy at just over 3kg. With some power tools you tend not to bother with the handle, but with this one it feels better with it fitted. The motor range is from 600 to 3000 RPM and there is plenty of torque at low speeds. Increasing revs is seamlessly smooth and it is the quietest polisher I have used. The machine is designed to be converted to a sander and again it has a soft start feature. However I am not so keen on the foam polishing pads they supply for it and prefer to use it with a 3M polishing pad
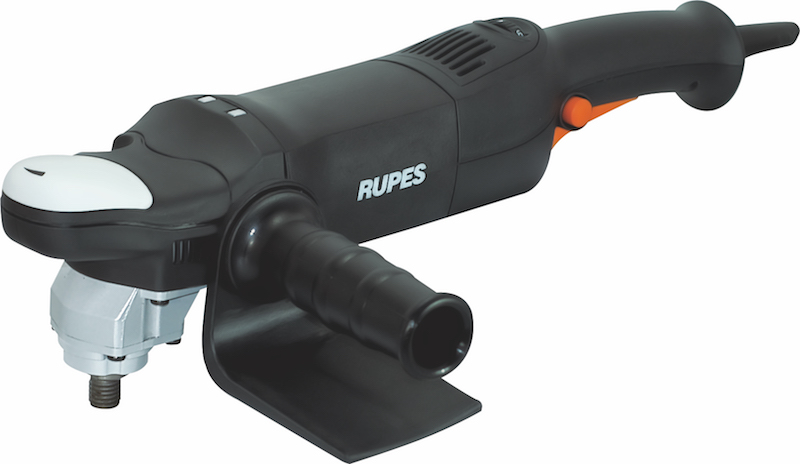
More expensive, but a durable, quality machine which I know professionals use, is the rotary Rupes LH 18ENS (£198.00). At 2kg it allows you to work away comfortably, especially when using the polisher for long periods or when doing overhead polishing. In operation the dual gear reduction system provides plenty of torque at low revs and vibration is low. The soft start feature means you can ease into the polishing motion without the pad rotating too quickly as you start. The machine will rev from 700-1850 RPM and the speed dial is conveniently placed close to the on/off operating trigger

At the budget end of polishing machines the Silverline (£54.95) is a third of the price of more expensive models and it does have it clearly written on the box that it comes with a 3-year guarantee. It is certainly a serviceable tool and the robust feel is heightened by details such as a durable metal rather than plastic casing around the head for example. And it comes with spare brushes for the motor. However the polishing accessories included in my opinion are poor and the trigger mechanism can be a bit stiff. Another downside is that at 2.9kgs it is on the heavy side if you are doing a lot of overhead work
Features to look for
Ideally it would be good to try a polisher before you buy because some polishers seem to have quite a lot of vibration when compared to other models. Individual testing isn’t usually possible but there are general things to look for. A prime consideration is that ergonomically the tool should feel comfortable. A lightweight tool with a slim body makes handling easy. One that weighs 2kg will feel very different to one that weighs 3kg, although if the machine feels well balanced in the hand then this makes a difference.
Look for a variable speed selection – and a ‘soft start’ feature where the revs build up slowly is also handy. Some polishers have the power switch on top of the machine which I find more awkward to use than a trigger embedded in the handle. The latter is more practical because you don’t have to move your hand for the on/off control. Also a top switch does not switch off automatically when you release your grip on the trigger handle.
Most power polishers have side handles included but some designs also have a protruding stub head at the business end so you can grip it here too. I actually find this type of grip an easier technique because it allows you to more readily gauge the pressure you are applying to the polishing head – particularly handy when working on deck mouldings and around fittings.
A loop handle design makes it easy to change hand positions and balance the machine to get a comfortable polishing action. This type of wrap around grip also means that when you put the polisher down on its back in a grubby boatyard it keeps the tool body and pad clear of the ground. A spindle lock for when changing pads is also useful.
Finally look at the power cables – as with any power tool on a boat, the longer and stronger the better. Cables should have a stout entry point so they are not ripped out easily; they should be durable and flexible and not kink and snag as cheaper plastic coated wires can tend to do.