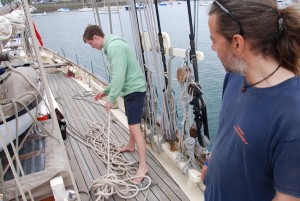
In our experience of teaching folks to sail, both on our own Traditional Boat Skills courses aboard Amelie Rose and through the RYA YachtmasterTM scheme we’ve come across many “methods” for doing everything from making a cup of tea to picking up a man overboard. Some of these are excellent but none of them is always the right way to get the job done. Even the good ones are merely a basic template for approaching the task in a safe and seamanlike fashion. As we often sail with inexperienced crew on Amelie Rose we’ve built up our own “Standard Operating Procedures” and, as you too may sail with inexperienced friends and family, we thought we’d share these – as a guide, not as a prescription.
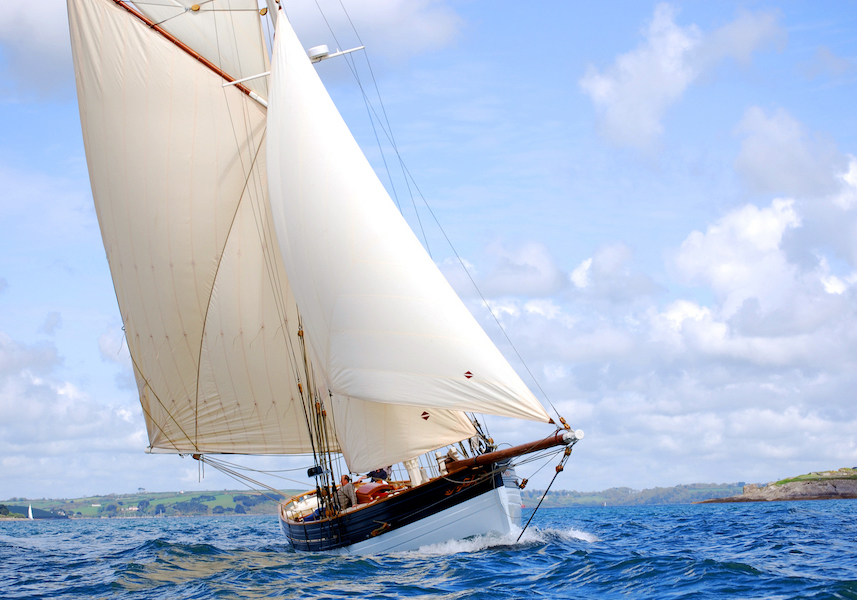
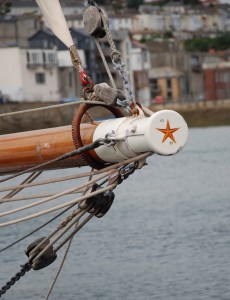
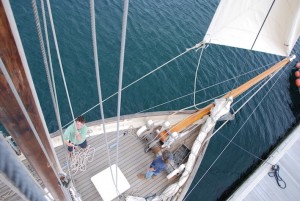
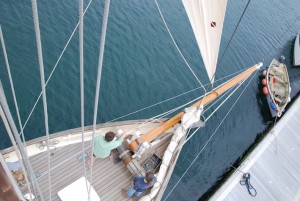
With their large mainsails aloft few gaffers sail well to windward without 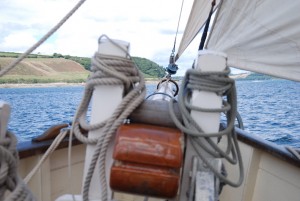 a significant balancing force acting forward of their “centre of lateral resistance”. For most traditional craft this force comes in the form of a jib, often set out on a bowsprit to increase the leverage of this relatively small sail. There’s usually no forestay out there to hank it onto which can make the foredeck a dangerously entertaining place to be when this mainly-unrestrained canvas is hauled aloft. Even the advent of furling gear doesn’t guarantee the safety of the hands up forward as they’ve still got to get it all up there and it’s not uncommon for issues to require them to drop the sail in the traditional fashion. So how to control our wildly flying jibs?
Preparation
It’s enough of a challenge to get the jib up and working without mistakes in preparation requiring us get it all down again in a hurry. Misled or badly tied sheets and halyards, twists in the sail and even the discovery that the jib was attached upside down have all played their part in Amelie Rose’s current record of four attempts to get it nailed on right. Careful preparation will mean that the job gets done right, first time, every time.
The crew too need to be prepared. Each person needs to know not only how to play their part, but also roughly how that part fits into the whole picture. This extends beyond the foredeck too. The helm is key to a successful hoist and the Skipper (if blessed with enough crew) should consider taking a step back to watch the whole process, enabling them to catch problems before they become apparent to those focused solely on the task in hand.
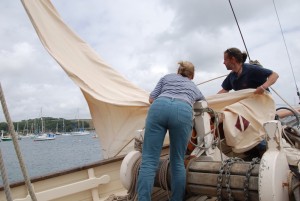
Setting the jib while motor-sailing with the main hoisted
gives us the option of sheltering the whole foredeck
behind the lee of the mainsail
Timing and teamwork
Especially when working with folks who are not used to traditional rigs it’s important to make sure that everyone understands the sequence of events, and what the start point is for the activity they’ve been assigned. A seasoned crew will fall to this naturally but with greener hands it’s often necessary direct each action during the hoist (e.g. “don’t pull this until they’ve done that” or even “don’t pull until I tell you to”).
Reducing the power It’s perfectly possible to hoist or drop the jib with the boat pointing to windward and if the intention is to sail off the anchor or mooring then this may well be necessary. Most of the time however we have, and use, our auxiliary engine so are most often likely to set our jib whilst motor-sailing with the main hoisted. This gives us the option of sheltering the whole foredeck behind the lee of the mainsail which will make a huge difference to the power being exerted on the jib at the critical point, when it’s neither up nor down.
Unless there’s a good reason not to (an imminent lee shore, boisterous sea-state or lack of experienced helm) we always raise and drop our jib with the wind aft. An additional benefit of this being that if all doesn’t go to plan we’re already taking the sting out of conditions on the foredeck, reducing the impact on the crew up there.
Other ways of reducing the power include controlling the jib itself. In lighter airs once it’s rigged it can be rolled into itself as it is pulled out on the traveller reducing the likelihood of it filling with wind or water. As conditions liven up consider putting the jib “in stops” as this allows you to hoist an essentially furled sail. (See Stopping-up a Jib.)
Here are our Standard Operating Procedures (SOPs) for Jib Hoist with mainsail up and engine running.
Double-check that the Jib is rigged correctly, the bobstay set and the working main mast backstay is hauled down tight.
Close-haul the main (in case of accidental gybe).
Post one crew on the traveller hauling line, briefed to haul out when told.
Post another crew on the bow (inside the jib, behind the lazy sheet), briefed to feed the jib out, rolling the sail around itself as they do, working with the traveller hauler to ensure that the jib is slack enough to haul out but not trailing in the water.
Post a third crew at the jib halyard briefed to hoist quickly when the traveller haul is completed, the hauling line made off and the hauler and feeder are clear.
Instruct the helm to bear off until the main is shadowing the launch side of the foredeck (very broad reach).
Instruct the traveller hauler and jib feeder to crack on.
When the traveller is out, the hauling line made off and the hauler and feeder are clear, instruct the halyard crew to hoist away smartly.
Once the jib is up, sweat down the jib halyard, sheet in the jib and tension up the rig using the jib purchase until the bowsprit is floating in the gammon iron.
Assume course and trim sails appropriately.
With fewer crew this method can be adapted for two foredeck hands by getting the jib feeder to come back and haul on the halyard. With fewer than three people aboard things get more interesting and in anything apart from light airs we would consider stopping up the jib so that one hand can operate the foredeck alone.
Dropping the jib
The keys to a successful drop are again preparation, teamwork and power-reduction. Care should be taken to make sure that the jib halyard is completely free to run. Bearing in mind that rope’s natural state is “a bugger’s muddle” this means flaking it out. (See Flaking a Halyard p9.) A green crew should also always be warned not to grab the clew or sheets before the sail is de-powered lest they find themselves jettisoned overboard if the sail fills.
Here are our SOPs again:
Flake out the jib halyard.
Check for lines over-board, start the engine.
Close-haul the main (in case of accidental gybe).
Station a crew at the traveller line briefed to bring it in when asked. Once the traveller is back at the stem they should get an arm around the front of the descending sail in order to encourage it to drop in the boat and not into the oggin.
Post another crew at the halyard briefed to keep a turn on the belaying pin until asked to drop. When the drop is called they should let it go as rapidly as their palms will bear – without losing control of the halyard.
Post other crew on the foredeck briefed to grab hold of the sail once the halyard is running and get it all on deck sharpish.
Instruct the helm to bear off until the main is shadowing the launch side of the foredeck (very broad reach). At the correct point of sail the jib will collapse and cease to pull.
Instruct the traveller crew to haul in the traveller and then get their arm around the front of the sail from a point behind the stem.
Call for the drop from the halyard crew and get it all down quickly, watching like a hawk for large lumps of knotted halyard heading skyward.
Short-handed this is all achievable by one person thanks to gravity and (with the jib sheltered) the lack of loading on the traveller once it’s released.
Simply release the traveller outhaul and walk backward towards the halyard bringing the traveller in as you do. Release the jib halyard and haul the jib down (moving forward to capture the jib first at the tack). ★
IN DETAIL
Stopping-up a Jib 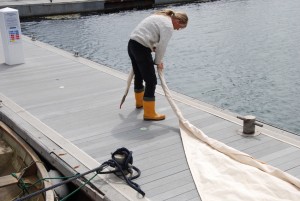
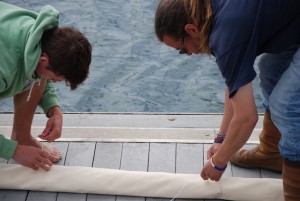
If a pontoon is available you’ll find it much easier to do this on it as even the smallest jib often has a luff longer than your deck.
Traditionally there was much talk about “rotten cotton” being ideal, but lengths of wool are just the ticket and easier to find.
Stretch out the luff, then flake the sail leaving the luff visible and the tack just peeking out over the centre of the luff.
Starting opposite the luff, roll the sail reasonably tightly until you have a long tube with the luff and tack still showing.
A lighter sail (e.g. a drifter) can just be bunched up rather than flaking and rolling but be sure to work along the luff.
Tie two or three strands of wool around the centre of the rolled sail passing through the tack (this is where the maximum unfurling pressure will be exerted).
Work away from the centre tying the rolled sail every foot and a half (50cm) or so, stopping a good two feet (60cm) from the ends (as this is where the least unfurling pressure will be exerted).
Rig the sail as normal.
When hoisting be careful not to pull the sail out of stops before you’re ready to go.
To fly the sail – just sheet in!
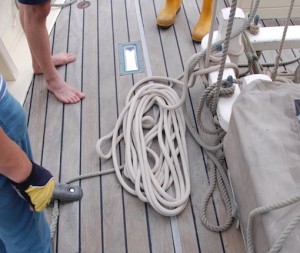
Flaking a Halyard
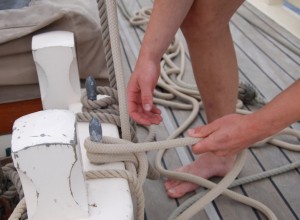
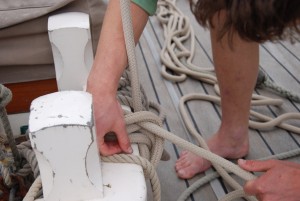
I’ve seen all sorts of fancy methods employed when flaking out halyards, from figures of eight to beautifully coiled affairs. None of this is necessary as all we are trying to achieve is to ensure that there are no snarls, loops or outright knots heading skyward to jam things up.
Start at the end furthest from the belaying pin or cleat. Work along the halyard chucking each handful on the deck behind you in a big unseemly pile. If you find any knots or snarl-ups work them out and then carry on piling.
The key is that the next part of the halyard to be paid out is always going to be on top of all the parts that come after it. Hey presto, no more snarls.
ABOUT THE AUTHORS
Nick Beck is a commercially endorsed RYA YachtmasterTM Offshore and YachtmasterTM Instructor. In 2009 he left the world of Investment Banking IT to start an adventure holiday and sail training business (Topsail Adventures) aboard Amelie Rose, his Luke Powell replica Scillonian pilot cutter. Since then he has introduced hundreds of people to the wonders of traditional sailing.
Having trained as a shipwright Diggory Rose first went to sea as a deckhand on the sailing trawler Leader in 1998. He has since pursued a career as a sailor and skipper of traditional boats too numerous to mention. Diggory is an RYA YachtmasterTM Instructor and Examiner and has a keen interest in the history,
role and purpose of traditional craft from all around the world.
See also Nick’s article on how to get the best from a Wykeham Martin furling gear: HERE
What do you think?
Join in the conversation on our Facebook page: facebook.com/classicsailormagazine
Have any problems with your boat that you’d like us to address?
Let us know via Facebook or email us at editor@classicsailor.com


